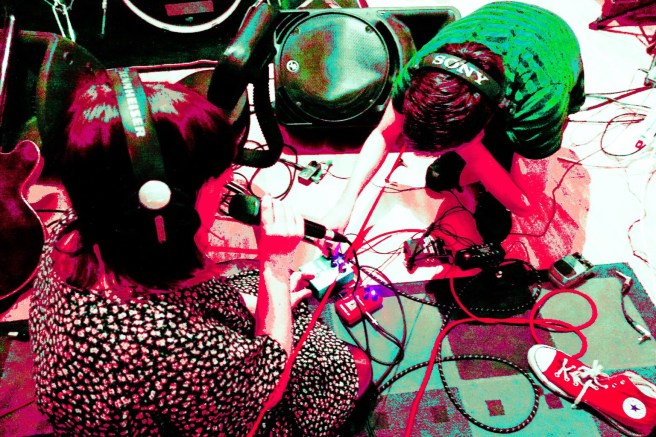
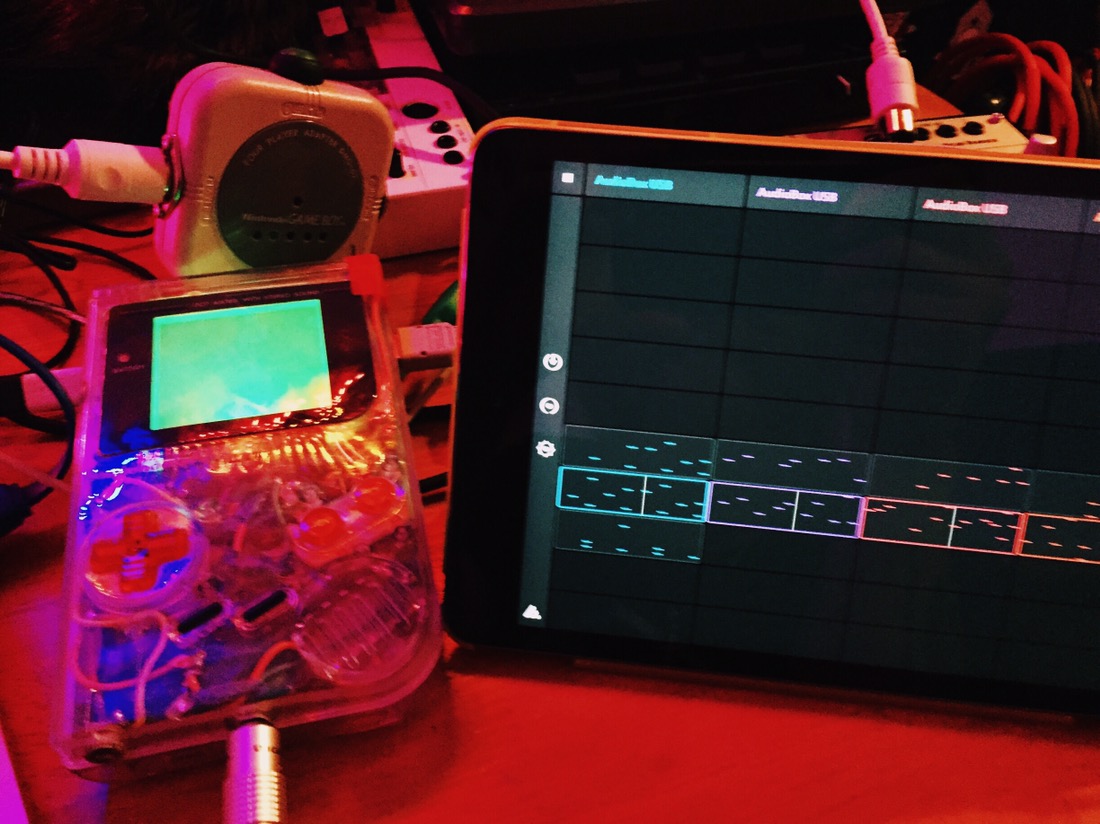
Me, making music on my latest modified Gameboy, by my old pal Neil Slorance, thanks to my other half.

Me, making music on my latest modified Gameboy, by my old pal Neil Slorance, thanks to my other half.

Not too long ago I read about how some genius called ‘irrlicht project’ had hacked old Texas Instruments graphing calculators so they could be used to make 1-bit music. Naturally, I had to have a bash at this myself. There’s something particularly special and rewarding about being able to compose whole tracks on devices that were never intended to work that way.
The models that support the ‘Houston Tracker‘ software are seemingly everywhere in the US, as they were apparently a mandatory purchase for many schools. That means they can usually be picked up fairly cheap second hand over there. However, as it turns out, these weren’t all that prevalent in the UK, so they are still fairly pricey – coming in at around £30 on eBay.
I finally got an okay deal though, and got to work getting Houston Tracker onto the device. It’s not all that straightforward, as you need a specific kind of cable – which costs almost the same as the damn calculator. Importing one from America worked out to be the most cost effective route in the end. Installation wise, there’s a lot of fiddling about to get the dependencies right on OSX, unless you use MacPorts – which saved the day. Once it was all up and running though, it was pretty good fun to use – with a whole host of features that I didn’t expect.
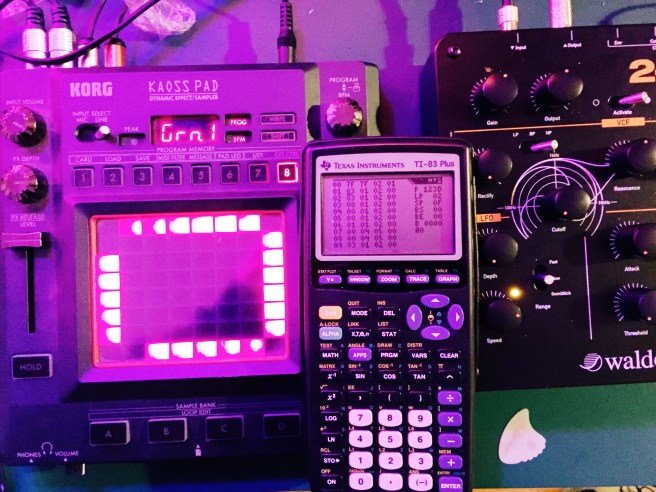
I recorded a fairly simple tune to find my way around the controls, and decided to record it. The raw calculator sound was a bit too bare for my tastes, so I threw in some minimal effects and overlaid some glitchy guitars/harmonised vocals. Here it is, my first calculator music track:

It’s been a while since I got pished on a Saturday night and just recorded some music. Well, I ended up recording after an hour of fighting with my mixer to work out why the stereo output was only producing mono…
There’s always the risk that it could have been my crappy soldering, which meant testing out every possible step. So many variables. Surprisingly, it wasn’t actually any of the Gameboys, but the mixer.
I’m pretty pleased with the result, and it should give a hint as to what the next album will sound like. Listen to and download it below:
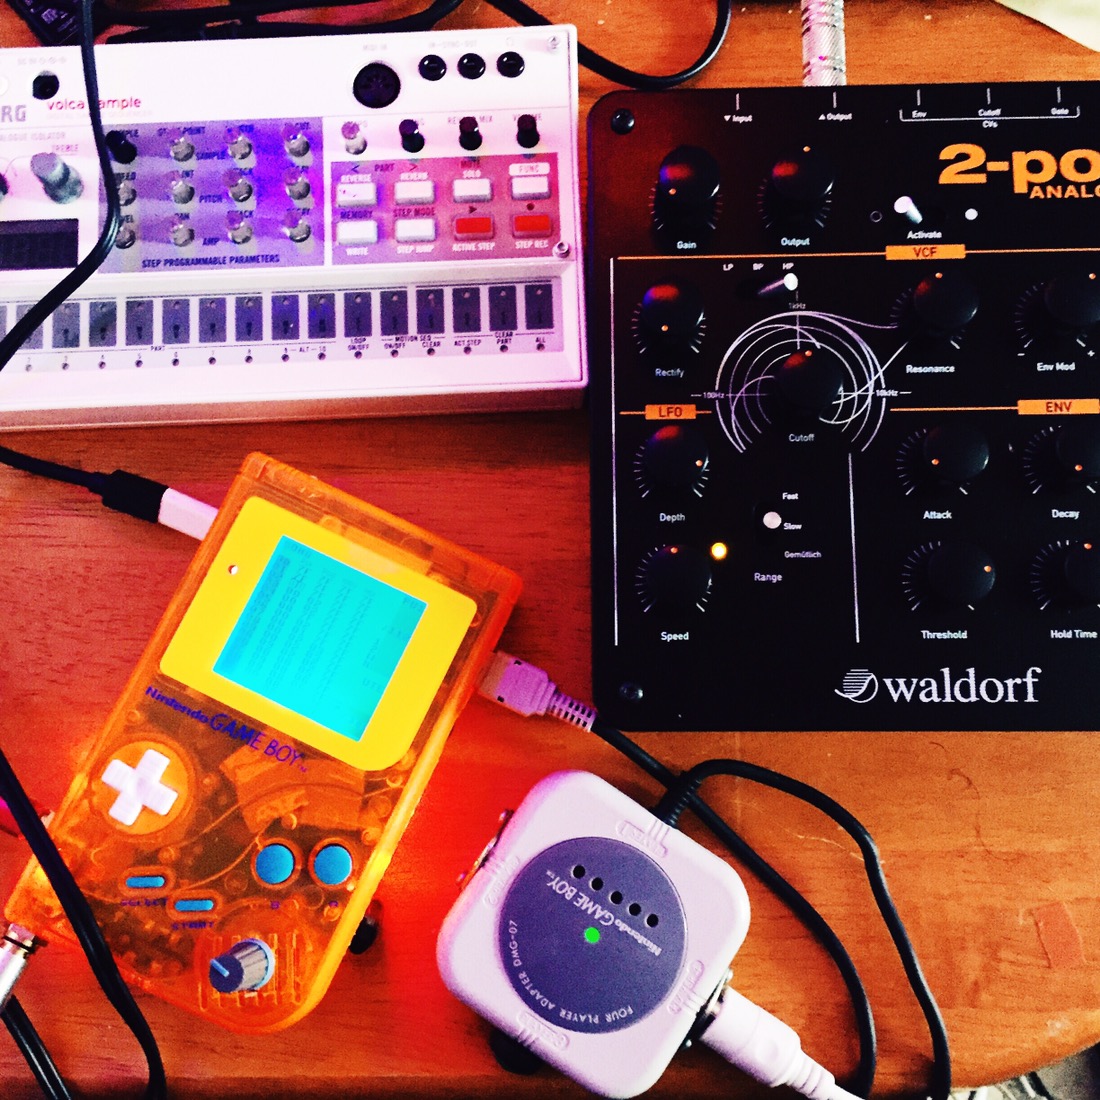
To finish off, here’s a picture of my tidied up workspace.


Recently I came across a modular synth system called Patchblocks, and thought I’d give it a bash, as the components themselves weren’t too expensive.
The idea is pretty simple, but deceptively powerful. Essentially you get various inter-connecting blocks that all have two nobs and two buttons, as well as stereo audio out/in ports. By connecting them up to a computer via USB you can use dedicated software to program them to do a whole host of different things, such as simulating drum beats, or acting as effects processors. The latter is what I am particularly interested in.

The device itself is pretty sweet, and doesn’t take up too much room, with a footprint just over the size of a credit card. I plucked for the clear blue plastic version, which apparently glows in UV light… you know… for all those times I’ll be playing live.
The build quality is good, and despite an exposed PCB on the sides, it feels pretty solid.
The coolest thing about these blocks is that you can set it up in whichever way suits your workflow best, rather than just ‘making do’ with workarounds. I’m always on the look out for different audio effects, and one of the things I miss when recording is having a hardware panning control. Sure, I could always just make use of a MIDI controller, but that still routes into Logic’s automation feature, which has never quite agreed with me. So, I set up one of the knobs to correspond to audio panning. That left me with two buttons and one knob free. I added in a filter, with the remaining knob controlling the frequency, and the right button switching through between High-Pass, Low-Pass, etc. The other button I set up as a bypass, so when it was ‘on’, the filter was active. The LEDs also correspond to the particular different modes.
Here’s what that all looks like in the patchblocks software:
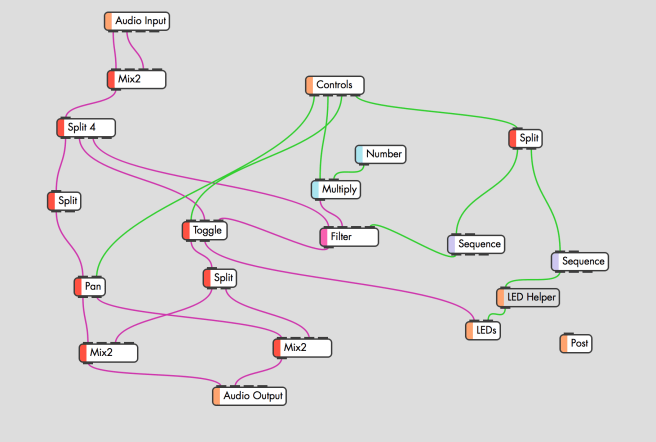
It looks complicated, but it isn’t really when you get used to it. Just like that, I have an effects unit that’s customised to do exactly what I need, and which I can modify at any point. Pretty cool.
If you’ve got a patchblock yourself you can check it out here. You’ll need the custom ‘LED Helper’ block that you can get on the Community download section of PB.
Sadly the block I received seemed to have a dodgy output when the audio input circuit was running, so I’ve sent it back for a replacement. The PB people couldn’t have been any nicer about it though, so I’m looking forward to testing it out properly when it comes back.
If you like hardware controls, but want to be able to fulfill a host of different functions in just a few boxes, check out the patchblocks. If you’re into the synth side of things more than the effects, there’s even a dedicated block to provide MIDI DIN in/out functionality. That’s something I might have to explore at a later date.
Update: I got my replacement unit back, and whilst some of the artefacts have been cleaned up, the quality is still noticeably worse than the input. It looks like it’s down to the sample rate of the unit itself, which is a shame – as it limits their usefulness as effects processors.

I’ve been bashing away writing and recording over the past few weeks, building up a decent library of tracks, and seeing what I can do with the various different apps that are available for the iPad. Lots of them make pretty cool sounds or loops in of themselves, but aren’t much use for anything other than that. There is some good stuff in there though.
The aim is to record as many tracks as possible, even if I don’t have an immediate specific use for them. This is a bit of a change from what my approach has always been… namely, an impatient one that meant I’d release pretty much everything I finished. Now, I’m getting a better handle on my gear setup, and certain songs are floating to the top naturally. It can be frustrating at times, but taking the longer road will hopefully result in some of the best stuff I’ve done as unexpected bowtie. I’m toying with the idea of releasing the rest as a sort of odds-and-ends EP as well.
We’ll see.

On Saturday night a few of us headed out (full of rum) to belt out classic power ballads for a few hours. It was good times.

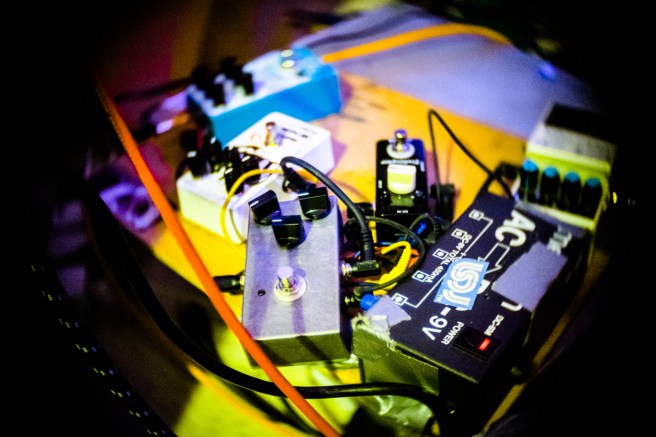
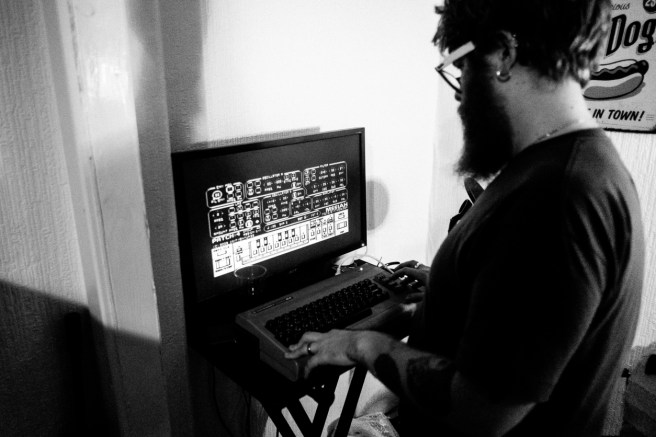
We didn’t feel all that great on Sunday though. Normally I’d just lie about and eat rubbish all day, which eh… I did anyway. But Lee aka radiomoths came round and we recorded the base of a new track with a bunch of different pedals, synths, and the C64. It’s all de-tuned and sounds a bit like the soundtrack of some robot death march from a film. Lee also took photos that I’ve stolen from his blog.


After we were done, I ate some more rubbish food. Not too bad a way to get through a hangover.

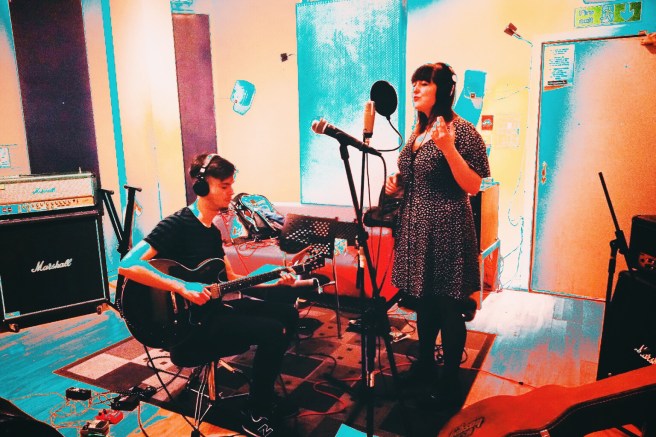
On Friday I spent some time in the studio working on different tracks. One of them was an experimental cover of ‘Somewhere Over the Rainbow’ with my sister and her boyfriend singing and playing guitar. They studied music at University, and it was nice to record with people who knew what they were doing.
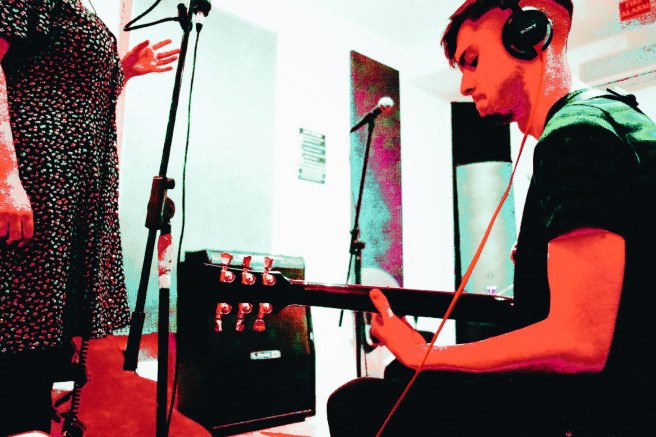
We used a bunch of different effects to layer the sound up, and I added in chip drums later on.
You can hear and download the track below. It’s ‘Somewhere Over the Rainbow’ like you’ve never heard it before. In someone else’s words:
I could imagine it being played at a f**** up fun fare with porcelain dolls singing as they go round in a Ferris wheel.
One of my work colleagues read about my Gameboy fiddling and kindly posted up one of his old grey DMGs that was destined for the charity shop to see if I could do anything with it. I decided to document its transition.
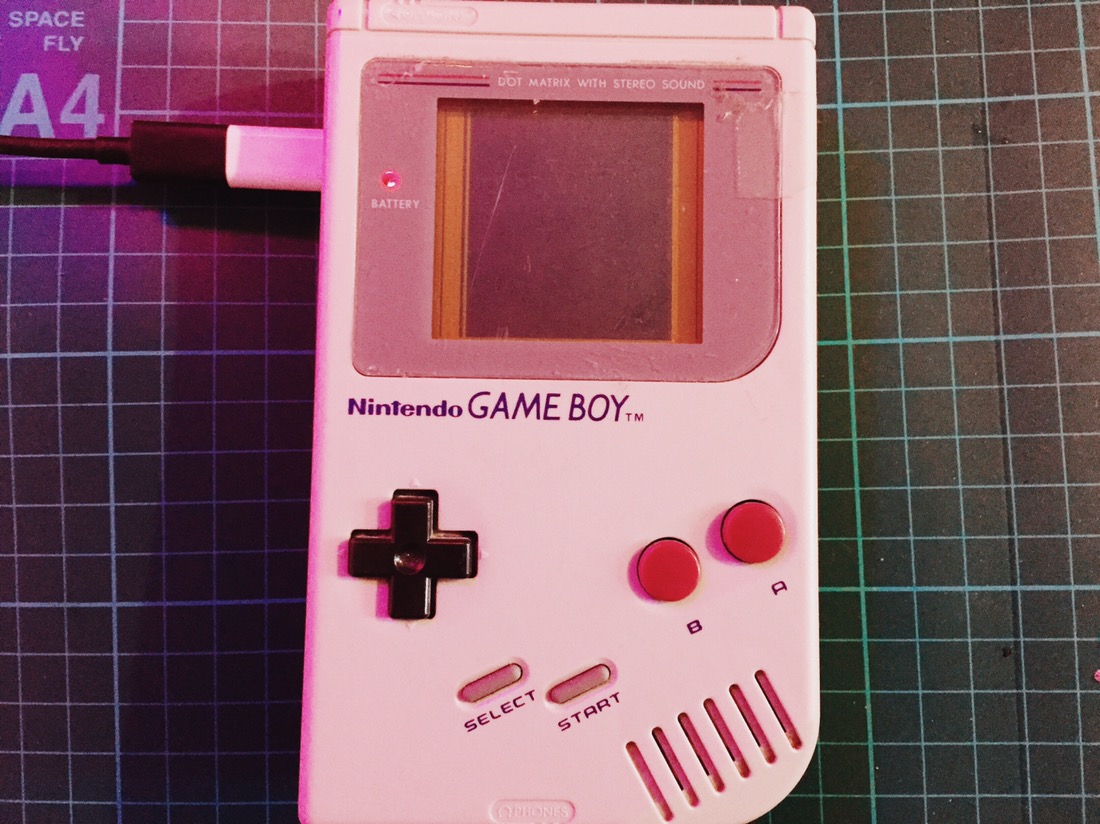
It was in the kind of standard condition for a used Greyboy of its age. The case was a bit roughed up and the LCD screen had vertical lines of dead pixels at either end. You can make them out below.

First things first was to see if I could fix that, as if the screen was dud, it would only really be worth spare parts. Luckily, it’s a pretty simple job, and before long the screen was as good as new.
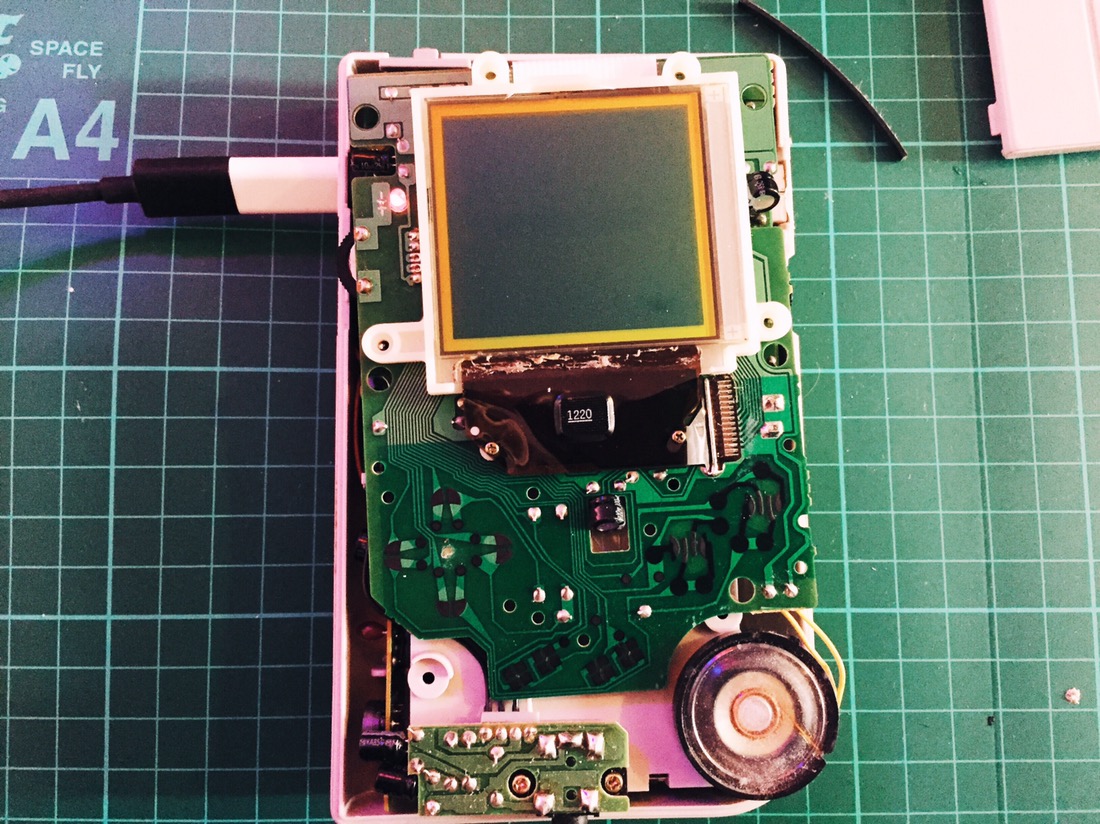
With that, it was time to set about preparing the screen to put a backlight in. The old Gameboy screen was always a nightmare to see, so installing a new LED light source is a must. It’s also a tricky process, involving removing the foil back off of the screen itself. One wrong move and you can trash the whole thing. As it turned out, the adhesive on this particular Gameboy hadn’t corroded away, meaning it was a pretty smooth and simple process.
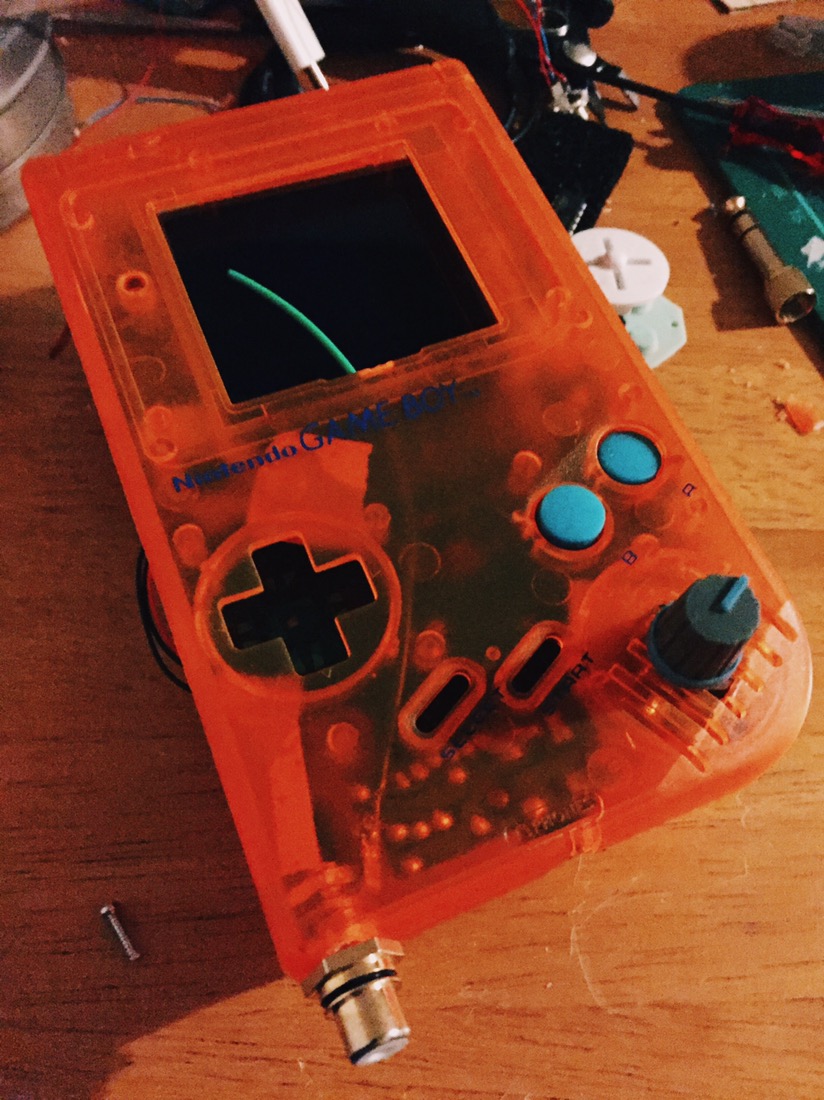
Then I put the Gameboy guts into a new case: transparent orange, which is a colour that was never available for the DMGs back in the day as far as I’m aware.
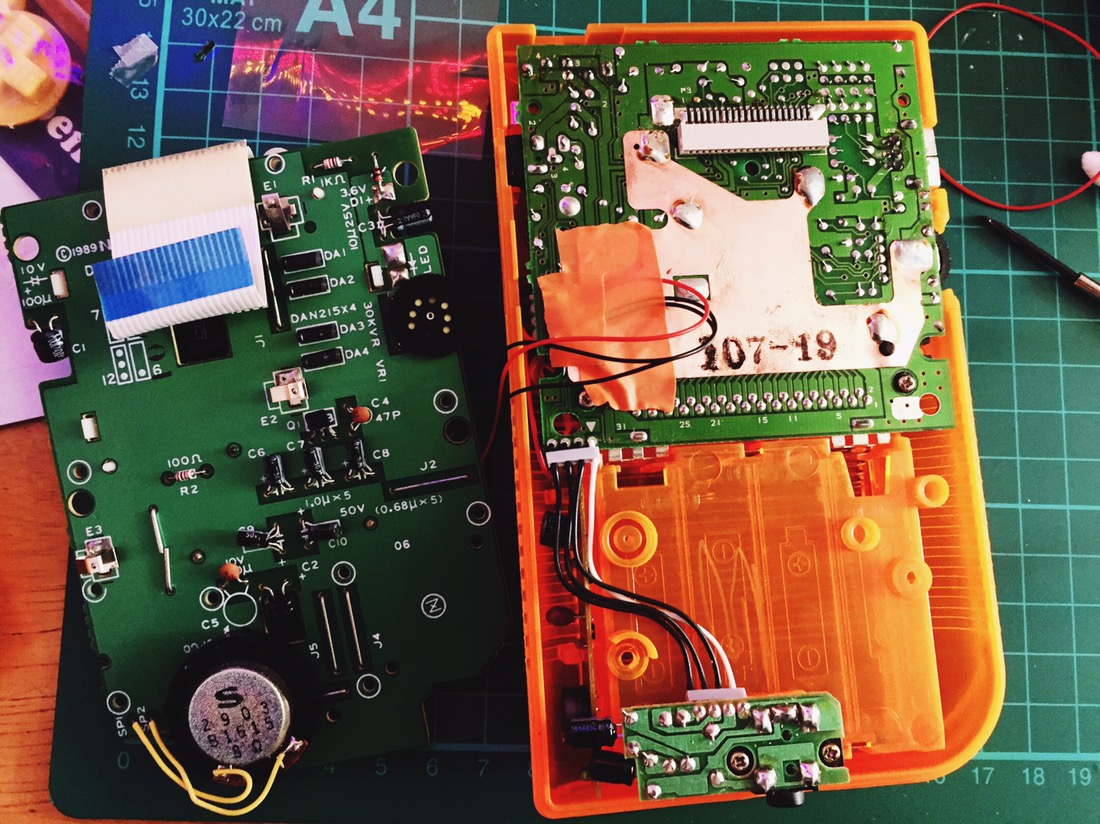
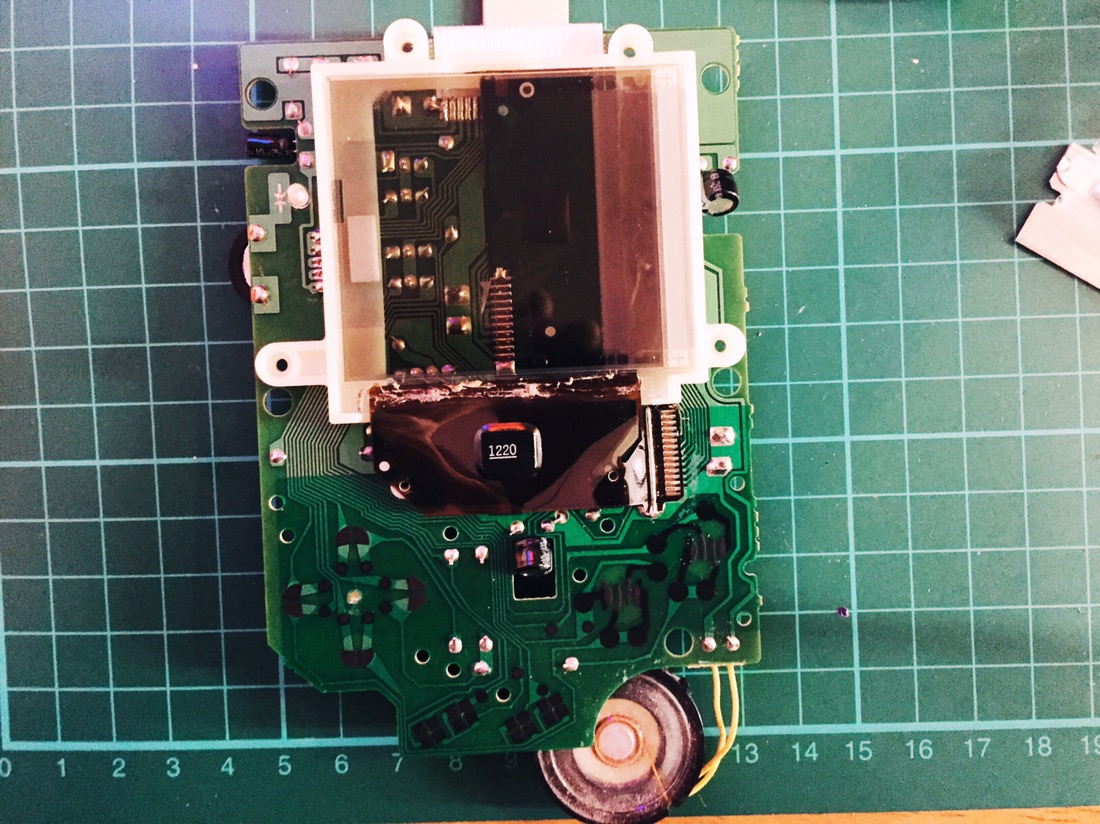
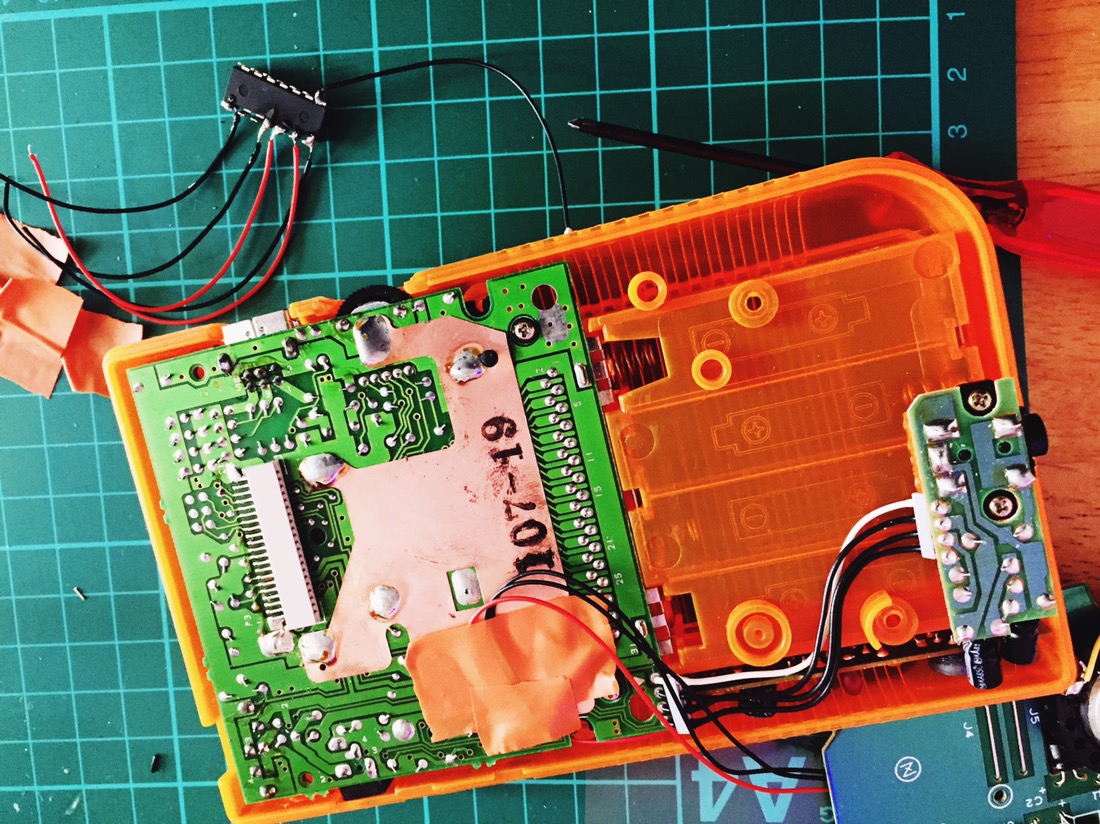
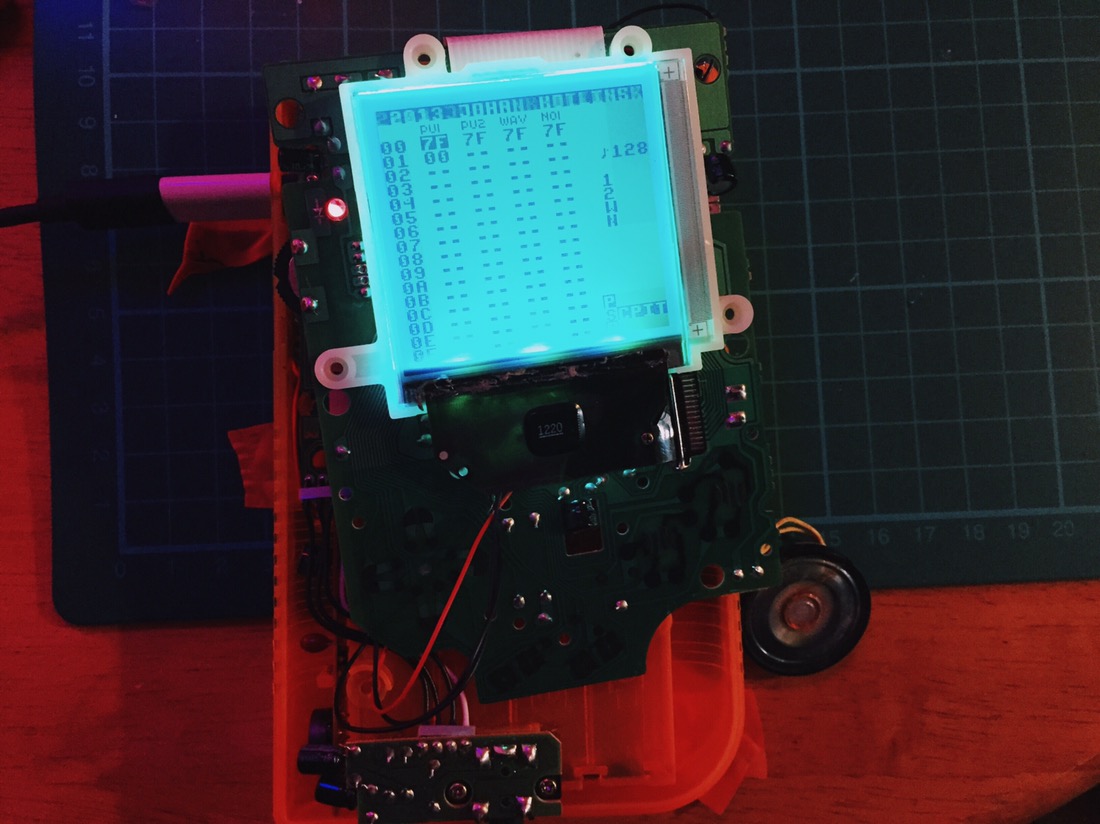
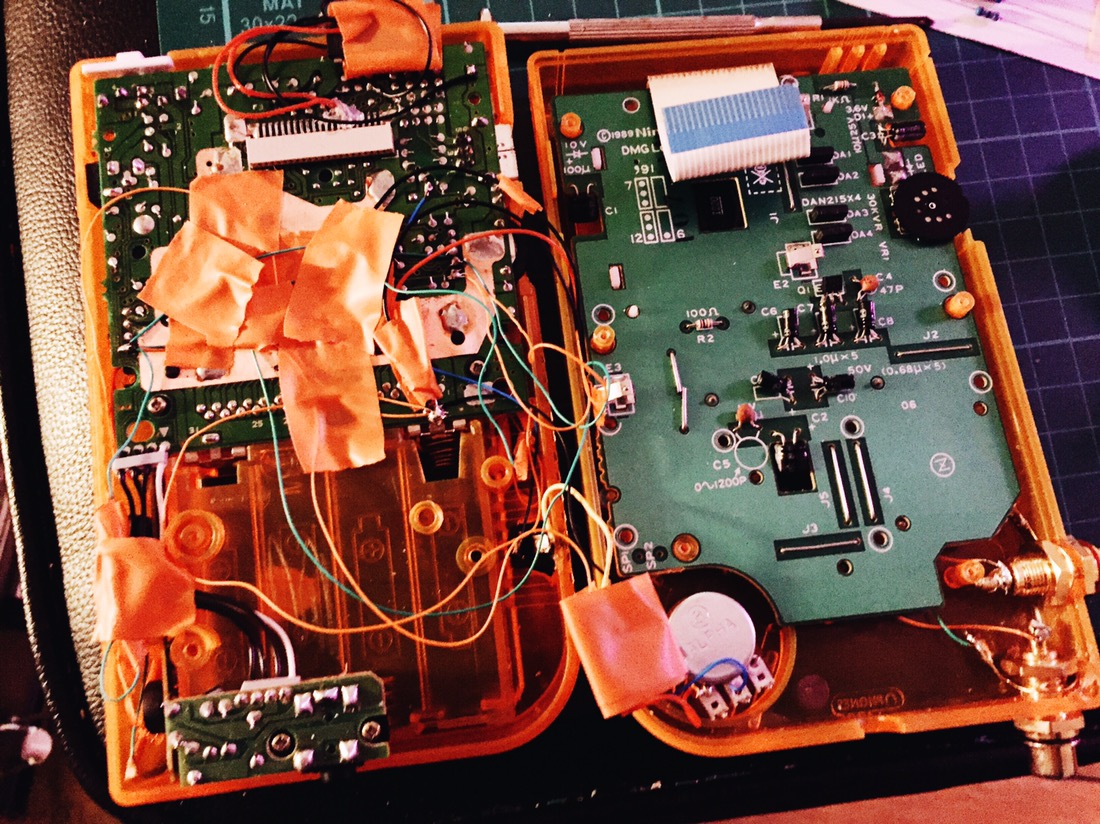
Next up, I installed a hex inverter chip to ‘bivert’ the screen. The new backlight polarising filter inverts the screen already, and so this step inverts it back to the regular display type, increasing the contrast in the process. It’s fiddly, but drastically improves the clarity. I’m pretty blind, so any picture improvement is a win.
It took a while as I didn’t realise that the backlight kit was missing a crucial resistor, and I had to go through each step to test it all again. A good lesson in not trying to do too many things at once.
Here’s the screen all lit up and biverted.
Next was installing a pitch oscillator that I had had lying about for ages. In other words, a small knob that changes the clock speed of the Gameboy to run faster or slower. What’s the point in that? For games it helps speed up boring parts that you can’t skip, but for music it lets you slow down or speed up things with the corresponding pitch change. Pretty damn cool.
The potentiometer fits into the space where the speaker sits, so it had to go.
I included a switch to turn the pitch oscillator on or off, which turned out to be a bit too big for the case…
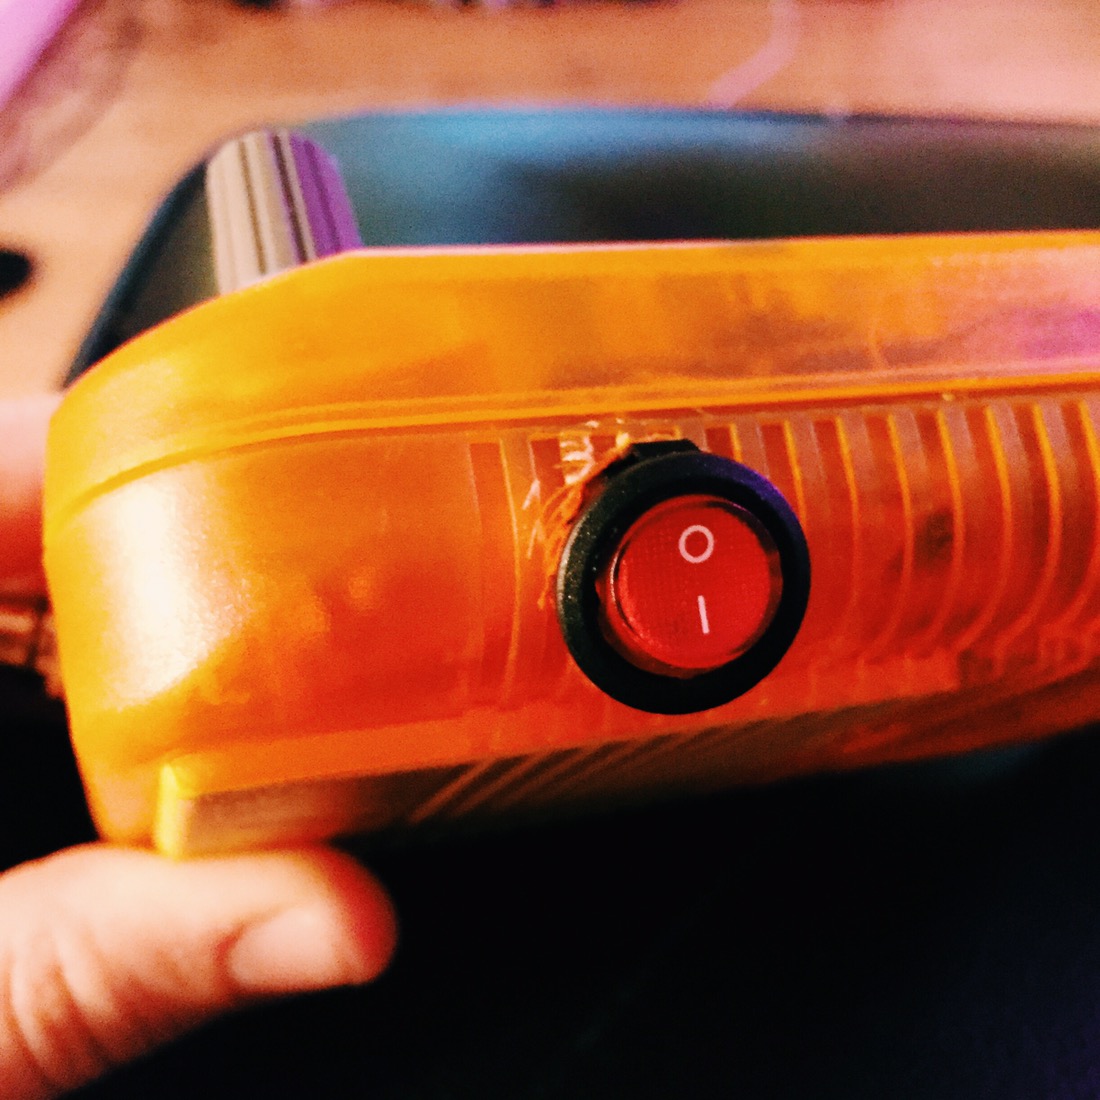
I also wired up two RCA jacks for line level audio output. This wasn’t the ideal place to put them, but space was tight because of the other mods. I had begun to install a 3.5mm line out in the same position, but realised that the plastic seemed to be much thicker than in the other model I had done this on, and so the barrel was too short to fit through. RCA it is!
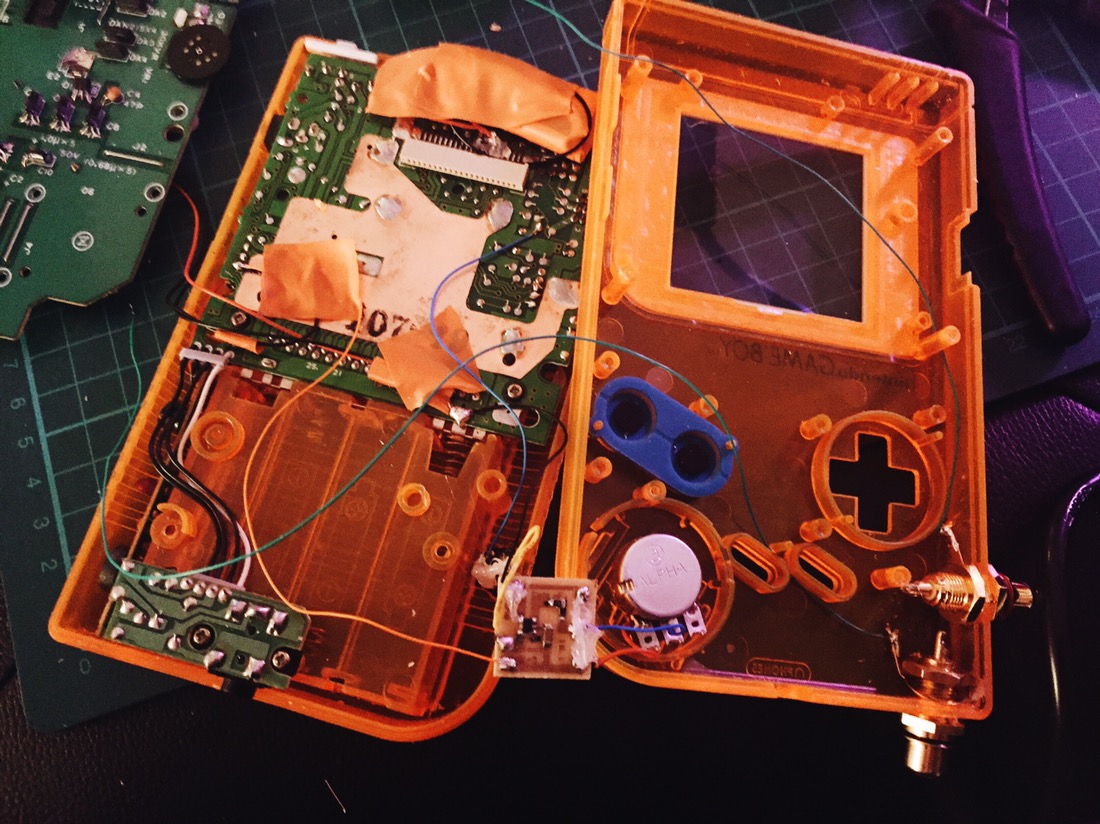
There was a lot of wires in there by this point. Just for fun, I decided to throw in some orange LED lights to give the case a nice glow. By the end of that, it was a bit tricky getting the case to go back together neatly.
At least I used appropriately coloured electrical tape…
So after a good few hours working on this beast, spread across a few days, here’s the finished result:

The case cutting and drilling leaves a lot to be desired, with rough edges obscured by the buttons and pots… But you can’t really notice. Despite that, I’m pretty pleased with the end result. Everything works, I learned a fair bit, and an old Gameboy has a new lease of life.
So this is pretty cool. I’ve gotten a hold of an iPad Mini 2 for pretty cheap, which has a whole host of different apps for making and producing music. They are fun to play with on their own, but really become powerful when you synch them up with other bits of hardware using MIDI.
![]()
Today marks the return of the X-Files. To mark the occasion, I’ve come up with a chiptune tribute: ‘toads just fell from the sky’.
https://soundcloud.com/unexpectedbowtie/toads-just-fell-form-the-sky-x-files-tribute
The truth is out there.
