After the last few posts concentrating largely on gear and production stuff, it’s good to be able to follow up with one centred on music.
I had planned to wait until I had an album together before releasing anything, but it became clear that a number of the earlier tracks had a sound that naturally branched off in a group. As a result, my first release in 4 years will be a 5 track EP titled ‘really something’. I can’t quite believe it’s been that long, but there we go.
The tracks themselves are all fairly laid back, and stripped back a lot from my previous sample-heavy chiptune releases. The only time the pulse really increases a shade is on ‘Down Street’, a track which previously only ever featured on the ‘Relycs‘ collaborative release that was put out on cassette, and dedicated to abandoned tube stations.
It feels like a nice transition. Listen out for my pal Haigie’s laugh on track 5.
The whole thing is up to stream/download for free over on bandcamp.
Gameboys are great, but arguably the classic analogue chip sound belongs to the Commodore 64.
The C64 was my very first computer, one that my parents got me when I was only about 4 or 5. As a result, it holds a particularly special place in my heart. Sadly the actual one that I had from back then disappeared at some point, but I tracked down a replacement later on, complete with one of the coveted working 6518 sound chips (or ‘SIDs’).
For ages I’ve wanted to bring the C64 back to life and use it as a vintage analogue synth, but the space required to leave it set up was always prohibitive. In my foray back into music, I decided it was time to take the plunge.
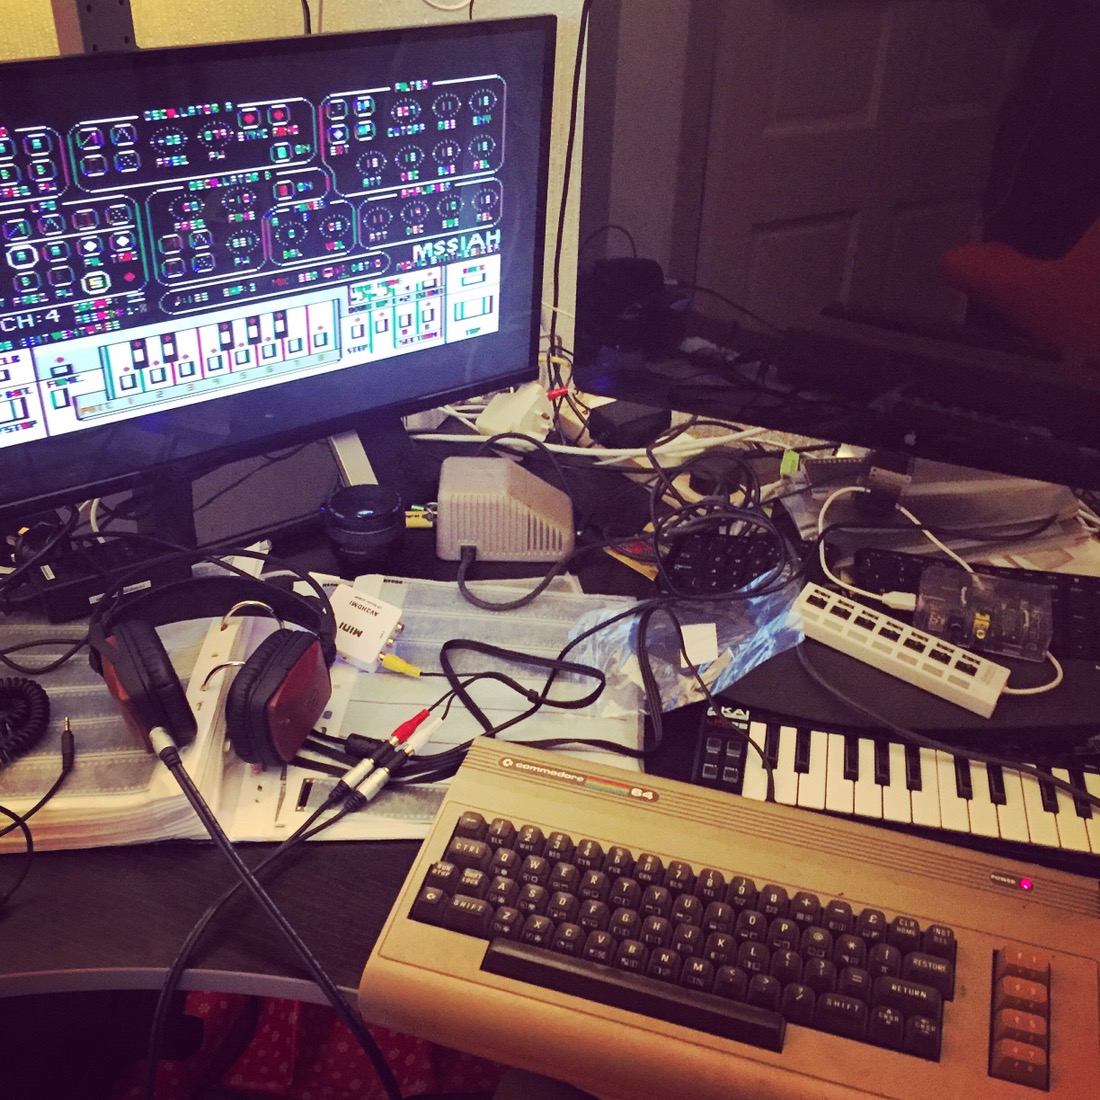
I already had all the bits and pieces I needed, including a really sweet expansion device called the ‘MSSIAH‘ cartridge, which plugs into the back of the ‘breadbin’ and adds MIDI support. Making use of a composite video to HDMI convertor that I use for my N64, I hooked it up to a monitor, and hey presto…
My desk is a bit of a jumble just now with various things on the go, but that’s not where it’s going to live permanently.
For the technically curious, here I’m using a C64 DIN out to phono/composite cable, with the video end going into an AVI to HDMI box for the monitor, and the audio portion connected up to my headphones using a phono coupler and phono to mini jack cable. This is just the testing setup though. When I switch to actually recording with it, I’ll be using a VGA monitor and running the phonos straight to a mixing desk for output.
I’m going to use it in a couple of different ways: to play directly as a synth, but also as an external synth controlled by the Gameboy, using LSDJ as a sequencer (see my previous post on this…). Using a MIDI thru box, I could run different channels into different devices simultaneously, which would sound amazing.
There’s loads of things to explore with the C64, which is pretty exciting, and should keep things fresh. Here’s a couple:
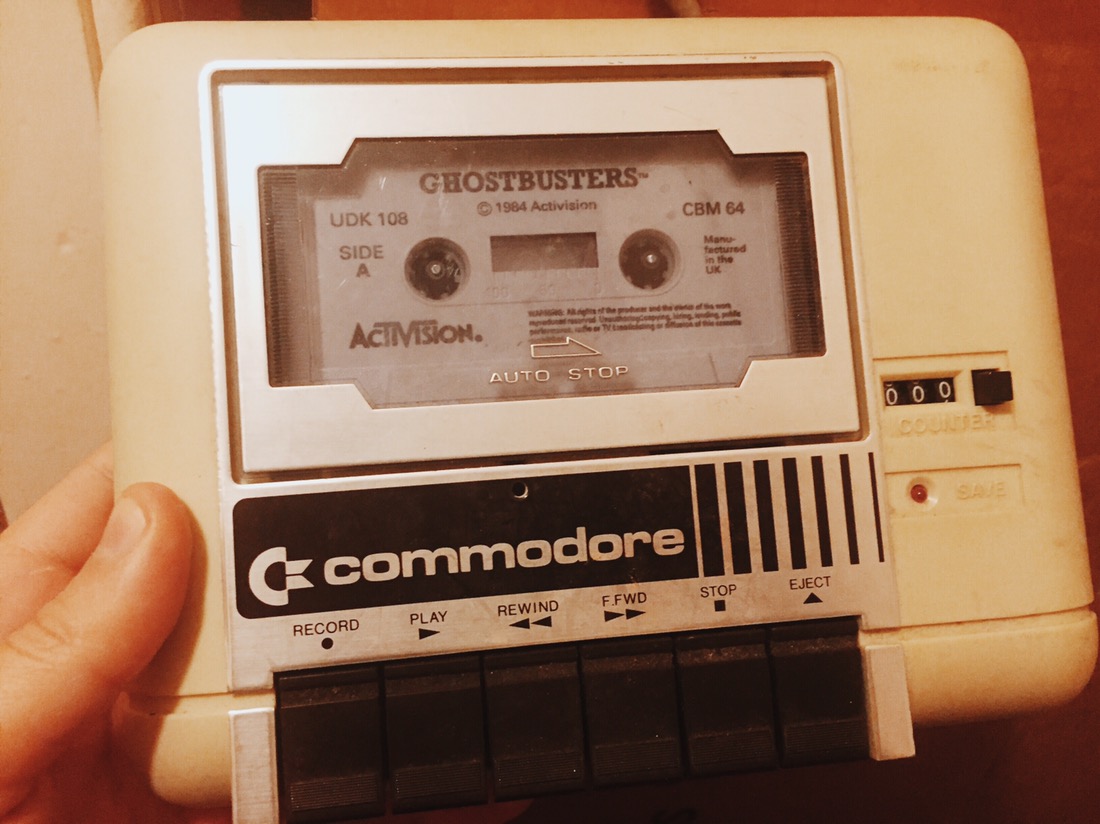
C64 SD tape emulator – To save sounds and patterns and all that you need an external device to store them on. The C64 used to rely on either cassette tapes (!) or floppy disks… and not the kind that most people are familiar with, but large, 5 and 1/4″, truly floppy disks. As it turns out, I actually have both of these…
but they’re not the most practical – taking up a lot of space and being a pain to use. In the past few years some intrepid people have developed gadgets such as a C64 cassette tape hardware emulator – that plugs into the back and allows you to save onto SD card. They’re pretty smart, but relatively pricey, so I need to see how much I’m actually going to use the thing before I commit.
Second SID – You can install two sound chips in the C64 with a bit of modification so that it can play polyphonically, and make it really sing. This doesn’t look too difficult to do, and could be a fun project for later down the line. I’d be interested to see if I can run two different chips (with different sound qualities) simultaneously, but I’m not sure if it’s possible because of voltage etc. Needs further research.
Picture upscaling – the video output was never designed for modern monitors, and certainly not to be run over HDMI at 1920×1080. As a result, the picture looks terrible – and the controls are almost incomprehensible with my crappy eyesight. I’m sure there are ways to improve upon it, such as through the use of a decent upscaler, but it also needs a bit more exploration.
The most important thing though, is getting it working as a synth first and foremost. At the moment, the sounds sound pretty weak. I suspect that might be because I’m not running them through an amp – so I’ll check that out. I’ve ran the diagnostics and the chip is fine, so it’ll require a bit more investigation. Just a matter of getting time to sit down and play with it.
Once you get over the steep initial learning curve of learning how to use a tracker like LSDJ on the Gameboy to make music, they can be a real pleasure to use: both powerful and simple.
Whilst the sounds you get out of the old Nintendo handhelds are amazing, there comes a point where you feel like you’ve gotten all you can out of them for the track that you’re working on, and at that point start to look into layer sounds from different places. There are a ton of different electronic synths and samplers out there, but I’ve never been a big fan of writing loops on them; the process often seeming unintuitive and overly complicated. It would be far easier to be able to program them using the familiar LSDJ layout, but that seemed impossible.
As I recently discovered, it apparently isn’t impossible at all. Back in 2011 I bought a special DIY-built MIDI device called an ‘Arduinoboy‘ from a guy called Ralph Tyler (aka NeX), who is a bit of a legend in the Gameboy modification world. This clever wee box brings MIDI connectivity to the handheld, and I have always used it up till now to play the Gameboy as if it was a synth, using a bog standard keyboard (the musical kind) and an app called mgb to trigger the notes. Pretty cool, but it turns out that LSDJ can now be used to send MIDI notes as well. I stumbled upon a video from chip musician jefftheworld doing just that, with a bunch of different Korg Volas, and it sounded just wonderful.
Just watch this… Skip to 1 minute to see the Gameboy kick in.
I decided I had to give this a go, so got my hands on a Korg Volca Bass, which is a really cool wee beast. I already had the Arduinoboy, so figured it shouldn’t be all that difficult to get up and running.
I should have known better.
I connected everything up, and LSDJ was sending clock signals successfully from the Gameboy to the Volca, but it wasn’t sending the notes themselves. Hmm. After a bit of research on chipmusic.org, I realised that the LSDJ ROM I had loaded onto my EMS Flash Cart (a specially made Gameboy cartridge that lets you load ROMS on via USB) wasn’t the right version, and so didn’t support the MIDIOUT mode. Not a big deal, as once you pay for one version of LSDJ, you get access to them all. I fired up the EMS Flasher Utility for Mac in the Terminal, and loaded the new one over.
Everything connected up again; LSDJ set to MIDIOUT mode; and the notes added in via the newly available ‘Q’ commands (Q00) on the existing track I had loaded up to test things out… I hit play, and… nothing. After a bit more research, I discovered that because I had bought my Arduinoboy years ago, the software that it was running was also probably out of date, and didn’t include the support for LSDJ’s MIDIOUT mode.
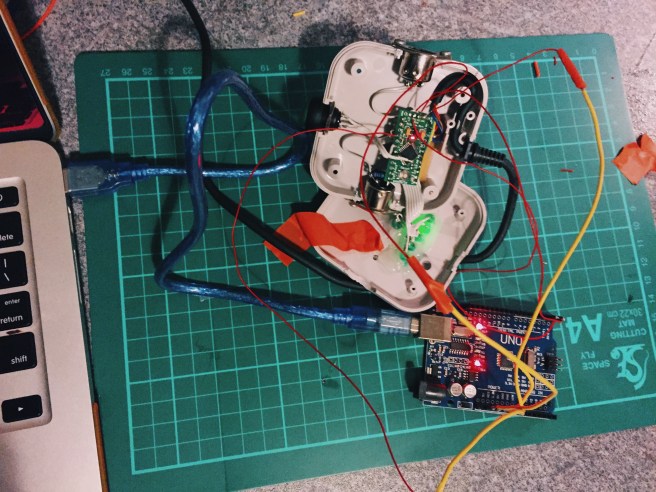
I’d never updated an Arduino board’s software before, and never even seen inside the Arduinoboy as I hadn’t built it… but, I’m no stranger to computers, and it seemed that updating the ‘sketch’ as it’s called would be as simple as opening up the case, and then connecting up the Mac to the Arduino’s onboard mini USB. That in mind, I grabbed a hold of my Tri-wing screwdriver (particular to Nintendo), and carefully began to open up the Arduinoboy.
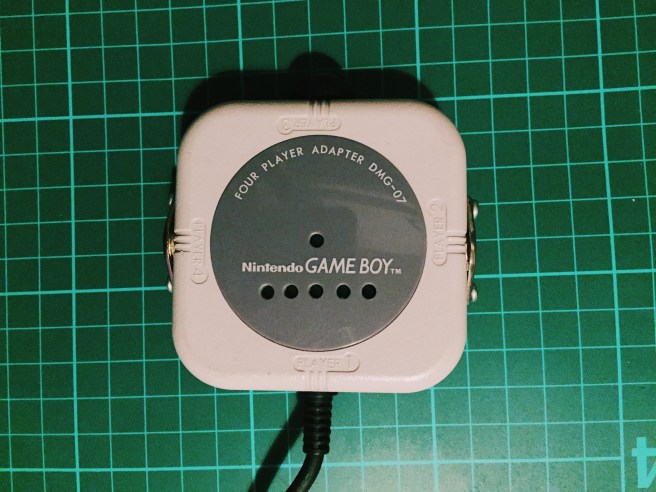
I forgot to mention, the Arduinoboy is neatly nestled inside an old four player adapter device, with the MIDI ports on the sides. Pretty cool.
I got the case opened up, and discovered my worst fear. The Arduino board that was acting as the brains of the operation was a ‘Mini Pro’, which meant that it had no USB built in, requiring a ‘breakout’ board, or some other connection to load the software on.
Crap.
By the looks of things, this meant de-soldering a lot of the existing connections that Ralph had put in there, and I really really didn’t want to do that, as his work with a soldering iron would always be infinitely better than mine… since uh, he knows wtf he’s doing. However, I couldn’t see any other way around it,so dropped him an e-mail whilst I looked up some schematics online. I had a spare Arduino Uno board lying around that I could potentially use to load the software on, so all was not lost yet – it would just be a bit more complicated than expected (shock).
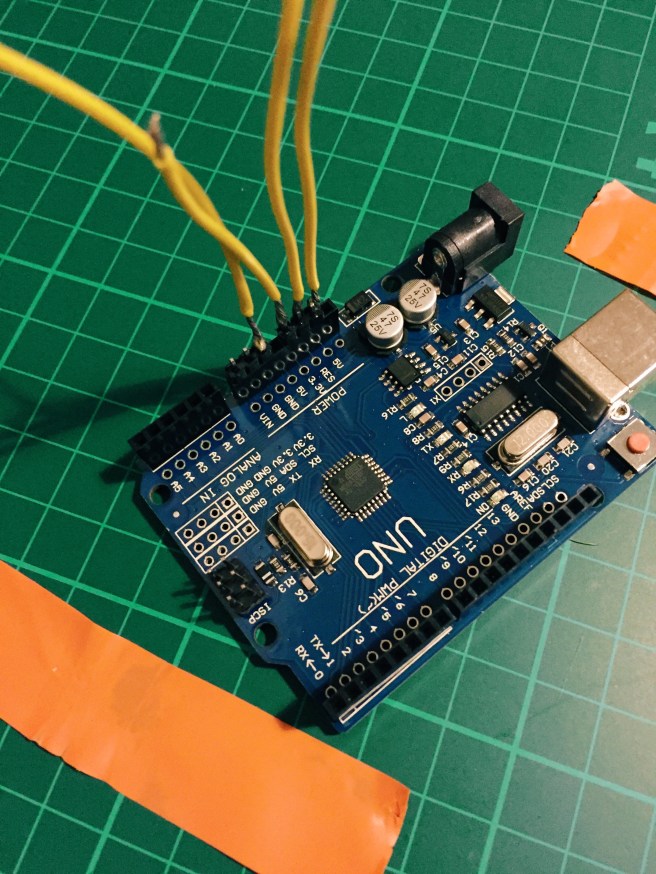
It turns out that Ralph is extremely nice, and with his encouragement I started to solder the various jump wires from the Uno board to the Micro Pro based on the steps here. The schematics in the comments were particularly helpful.
There are various glaring errors in the above image. Firstly, I took out the header pins to solder the wires as it seemed easier to do flat, but didn’t check whether or not the pins would all be next to each other. It won’t surprise you to learn that they are not – so there were a couple of extra stragglers. Secondly, I used wire that was far far too thick, because stripping down the thin wire is more of a pain. As it turns out, trying to solder that stuff to a tiny Mini Pro board is not going to happen, so I had to join all of the strands of big wire to smaller wire afterwards. Sigh.
Anyway, after a while I got all of the wires in place (give or take), and was ready to connect it up to the laptop and flash the software. Woohoo!
But, of course that wasn’t the end of the story. It turns out that the Arduino Uno board I got isn’t actually an official one, but a cheap knock off. I knew this at the time of purchase of course, and was trying to be a cheap bastard. However, it then came back to bite me as the Arduino IDE software kept coming back repeating the same error – something about stk500_getsync() and how the board couldn’t be found. Even after installing the pokey third party drivers it didn’t seem to be working.
I went down a rabbit warren of Google searches, checking the verbose logging in the console for errors and getting led on a wild goose chase by problems that were nothing to do with my own, and before long I felt like I was hallucinating. I was about to send a furious e-mail to the eBay seller that had sold me the Arduino ripoff in the first place, when I tried to load the Arduinoboy software onto it – without the Arduino Mini Pro connected. That worked, which meant that the board itself wasn’t the problem – but something to do with the communication between the two boards. Interesting.
That didn’t mean things were solved soon after though, as the problems still remained, and there was no obvious answer. I had checked and re-checked the connections to the board so many times I could hardly see them any more when I squinted, and was getting more and more frustrated. I thought I might have accidentally short circuited something or trashed the board by over-heating it… Things weren’t looking good.
After ages I finally stumbled upon a different set of instructions. To sum things up, there are two different kinds of chip installed on these Arduino boards: the classic ‘DIP’ kind (which looks kind of like a digital cockroach), and the more modern ‘SDM’. The former can be easily removed; the latter cannot. Either way, they need to be bypassed on the host somehow – or else the Arduino programmer gets confused between the two boards and freaks out. It’s just that it’s easier to do with DIP chips than SDM. (Guess which kind I have?). There are all sorts of conflicting ideas about how to do this effectively with SDM chips on the web, but as it turns out, the easiest way is to upload a particular sketch to the Uno board. The Instructables article had a copy of this, and I’m re-uploading it here for posterity: serial-disable.ino.
Some other important things that I learned:
Crappy knockoff Arduino boards can be good, but also require more fannying about. You need to install special drivers rather than it just work out of the box. Everything is more complex and fills you with needless uncertainty and dread when things go wrong. Just spend some more cash and buy a bloody real one.
The ‘programmer’ choice in the Arduino IDE doesn’t make a difference for most purposes.
You need to make sure that all of the connections to the TX and RX points are removed (except the ones you’ve added from the host Uno board obviously), otherwise it will lock up the board and prevent you from uploading (thanks Ralph!). This meant more de-soldering and trying to remember where to put things back later. *bites nails*.
There was a whole host of talk online about how if you were using a ripoff Arduino host board you would have to hit the reset button manually on the Mini Pro at just the right time to get it to initialise properly and take the software properly, because the reset points on them weren’t there. As it turns out, you don’t need to do that at all; the reset point is just named slightly differently depending on the board you have – and it’s just a matter of finding out what that is and connecting it correctly.
You need to select ‘Pro Mini’ as the target board, as it helps bypass the host board’s chip. Or something.
There are some truly insane people out there giving some really bad and incorrect information about this.
The order I wired up things in the end was:
TX – TX RX – RX RESET – RST GND – GND 5V – VCC
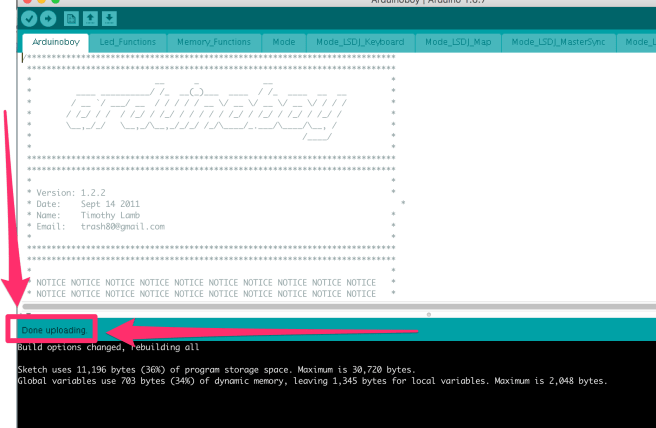
I can’t tell you how relieved I was to see this message:
HALLELUJAH.
So began the task of putting everything back together. I’ve never had the steadiest of hands, and I’m in the middle of Dry January – so have the jakey shakes due to lack of alcohol consumption – so probably not the best time to attempt re-wiring some fiddly electronics that were originally put together by far more deft hands than mine. However, I got it all back in place eventually – hopefully the joins hold out! I do not want to take this thing apart again.
At first my heart sunk, as it didn’t seem like anything had changed. The LED behaviour was a bit weird (less active than before…), and the Gameboy was still just sending clock signals, not notes. AGHH.
After a bit of jiggery pokery, it all came to life though. I was shocked. The damn thing was working.
I’m still not convinced that the LEDs on the Arduinoboy are going in the same pattern that they used to, but since everything seems to be working I’m going to put it down to the software change and think nothing more of it.
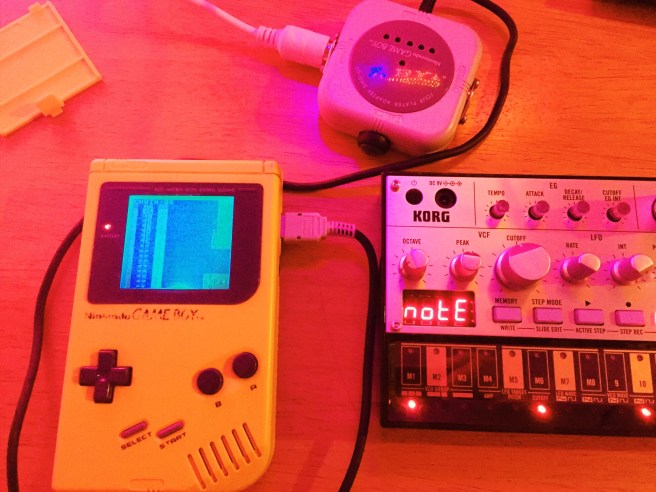
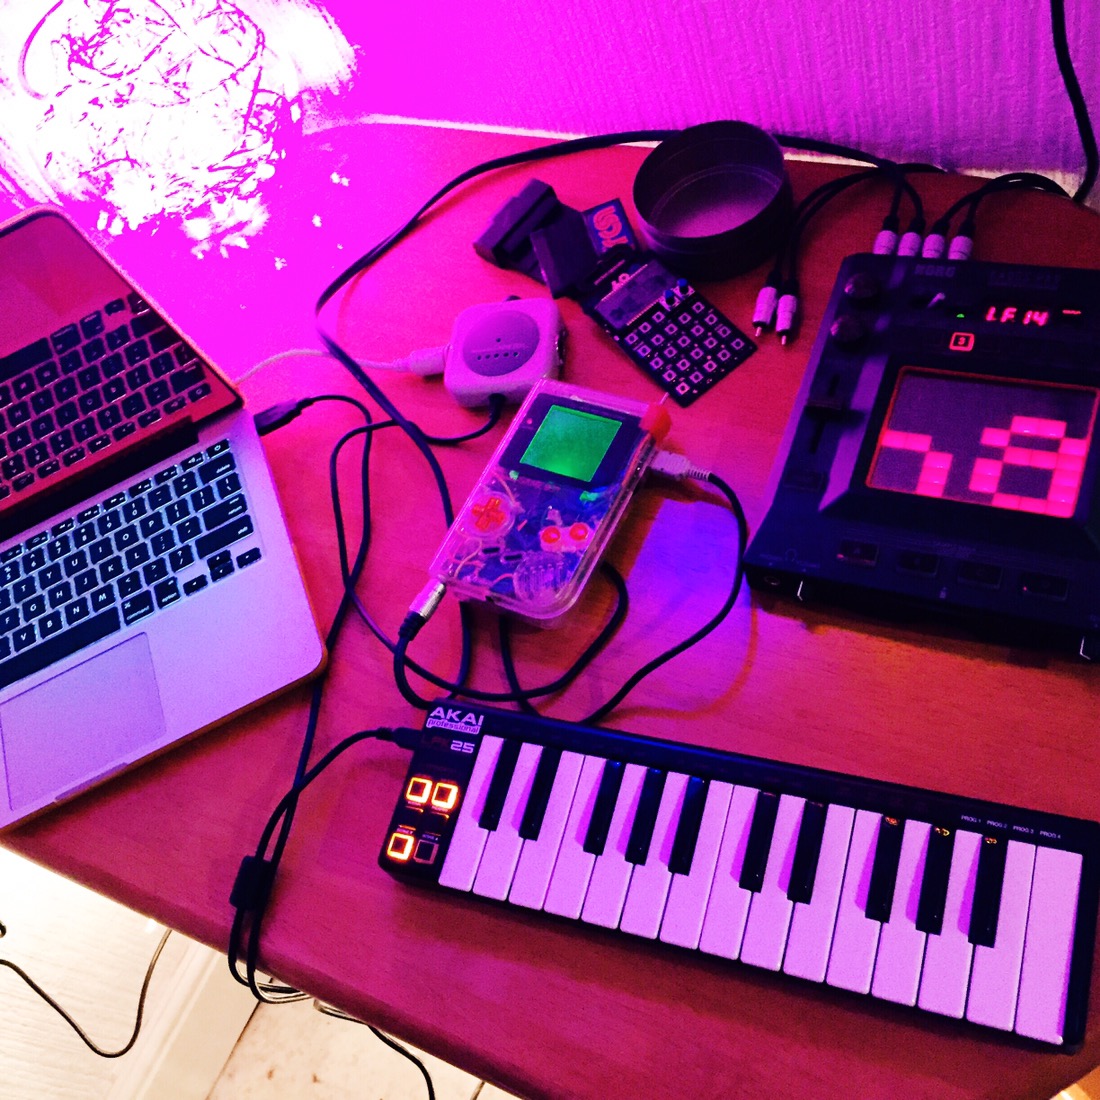
I shot a quick video to show the setup in action:
The sound is coming from both the Gameboy and the Volca simultaneously, and I’m using that particular Gameboy as it’s one of the few that still has the internal speaker intact (i.e. not ripped out for some other kind of mod). I fanny about a bit with the Volca controls to show how you can manipulate the sound, but I have no idea what I’m doing with it yet really.
Explanation of steps: You need to set LSDJ to MIDIOUT Sync mode, stick the Arduinoboy on the correct mode (for me it’s whatever the second LED means), and make sure the Volca is set to the right MIDI channel. The first column of LSDJ corresponds to channel 1, and so on. Hold down Write as you power up the Volca to change the channel.
And that, was tonight’s misadventure. I’ve no idea if I’m learning anything by doing all of this stuff or not.
On Saturday morning I had a Novation Launchpad delivered, and spent a good chunk of the rest of the weekend trying to figure out how to make use of it. I could easily get it to act as a MIDI input device for the Gameboy (which is sweet), but I really wanted to use it as it was primarily intended: to load up a bunch of chip loops and trigger them live as a sequencer.
After much swearing and frustration, I finally managed to get the loops synched up and laid out for one of the most recent tracks I’ve written. I just need to plug the Launchpad in, and I can play the whole song with the pads – triggering different combinations of sequences from about 1 to 4 bars long.
Much like a lot of the stuff I’ve been playing with lately, I wasn’t really sure why I was doing it in the first place; there was no real end game. I just wanted to see if I could do it. Being able to play with and manipulate songs/sounds that you’ve created on a tiny Gameboy screen in a more ‘live’ or dynamic fashion is pretty cool.
Now that I’ve managed to clear the biggest hurdle of getting it to work, it’s gotten me thinking. Theoretically I could now play a lot of my chiptune tracks live without just hitting ‘play’ on LSDJ – but I don’t think that would really be all that big of a draw in Glasgow. However, it does mean that I could set up chains of melodies, stick them into Ableton and then play them live as more of an instrument, as part of some kind of band setup. I’d just need to find some folk willing to play guitar and potentially drums in a weird quasi grunge electronic band.
The Mayor of London is something of an anachronism, both charming and disturbing all at once.
The infamously bumbling Mayor of London has rugby tackled children, sought to deploy water cannons and then volunteered to be sprayed by one when their use was banned, and single handedly cleaned up the streets of the British capital with his brush the day after the riots.
Nat Lyon from Connecticut – friend of the bowtie – has released not one, but two covers of my old track ‘sleeping solves nothing’ – from the 26 hour days album.
It’s a pretty awesome re-imagining of an acousticy number, and you can download it for nowt over on his Bandcamp page here.
Inevitably, a big part of making chiptune music involves exploring what you can do with different hardware, and how you can get the most out of it.
Whilst dragging out my gear again, I realised that I have a whole bunch of components kicking about from half-finished projects that I never quite got around to completing: Gameboy screens, shells, lights, switches, and other bits and pieces.
I want to modify my Gameboys so that they all have at least a backlight, and try out some other more interesting things like installing oscillators, so I thought I’d have a bash on one of the reliable bricks that I had lying about in pieces, and install a backlight in an otherwise unmodified yellow DMG.
I battered through the first bit easily. The foil that you need to peel off the screen for the backlight to fit came off without any hassle or residue left behind, and I remember thinking how much simpler it was than the last time I did it.
I should have known better though. Despite getting everything wired up fine, the screen wasn’t showing anything at all. Luckily, I have a pile of spare Gameboy guts to test things out on.
After a bit of swapping about, I realised that it was the screen itself that was the problem. No big deal, though the other screen I had to hand with the foil removed had a damage mark right in the middle that meant it wouldn’t be of any use for the final product. I’d need to remove the foil from one of the others.
For reference, here’s what the screen looks with an inverted backlight…
And without the inversion:
I dug into one of the other spare innards, only to find that the screen was warped and wouldn’t work. Damnit. That left just the one spare without cannibalising another body. I prised the foil off with a razor blade and after about half an hour of scraping/soaking in contact cleaner, got the crusty adhesive residue off.
After putting the damn thing together and taking it apart a few times as I discovered other minor issues (the buttons not fully depressing because of the wires to the LEDs etc), and fixed them all. Eventually, we have the finished product:
A working, old-school DMG with a lovely blue LED backlight so that it can be used anywhere. In the future I plan to add a hex inverter chip to make the screen more contrasty, as well as some other bits and pieces – but for now I’ll leave it in peace.
I knew absolutely nothing about physics or electronics before I took apart my first Gameboy, and I’m definitely not an expert, but there’s something pretty satisfying in putting together or modifying the hardware that you then make music on; squaring the circle or something like that. If I can work it out, then surely anybody can.
All in all, it took longer than I expected, but also wasn’t as complex as I remember from back when I was learning the basics. I’m looking forward to seeing what I can pull off in future.
I’ve been staying up way too late this past week, trying to do as much actual music writing as I can. It’s way too easy to get distracted by all of the cool things you can do with and to Gameboys to get different sounds, and forget about the actual composition bit.
I’m working on a track at the moment which it turns out lasts about six minutes. That’s a ridiculous length of time, and is probably the longest song I’ve ever made. It’s about three times as long as the average track time on the last all-chip album I did. I’m firmly of the school of ‘keep it short so people don’t get bored’, but it seems too late to turn back now – and I kind of want to keep it purely because I’ve never written anything this length. I’ll just need to plow ahead, though it can’t be a coincidence that it’s proving much harder going to get it to a point where I’m happy with it than usual. For now though, I need to give my ears a break.
In a previous life I was in a band called Closet Organ.
We had a song called ‘Rock! Neanderthal’.
A couple of years ago, Michael M from We Are the Physics remixed the track in a chip-tastic fashion, but for some reason the post about it disappeared.
Over the past couple of years I’ve hardly written or recorded any music. Part of this is because I’ve been so busy doing other things: moving flat, grappling with the UK immigration process, getting married, and travelling a lot. On top of that though, was the lack of any dedicated space where I could leave my recording gear set up, ready to be used whenever.
The time has come to do something about it, and I’ve reclaimed space in a corner alcove that previously was home to our washing and a couple of bikes.
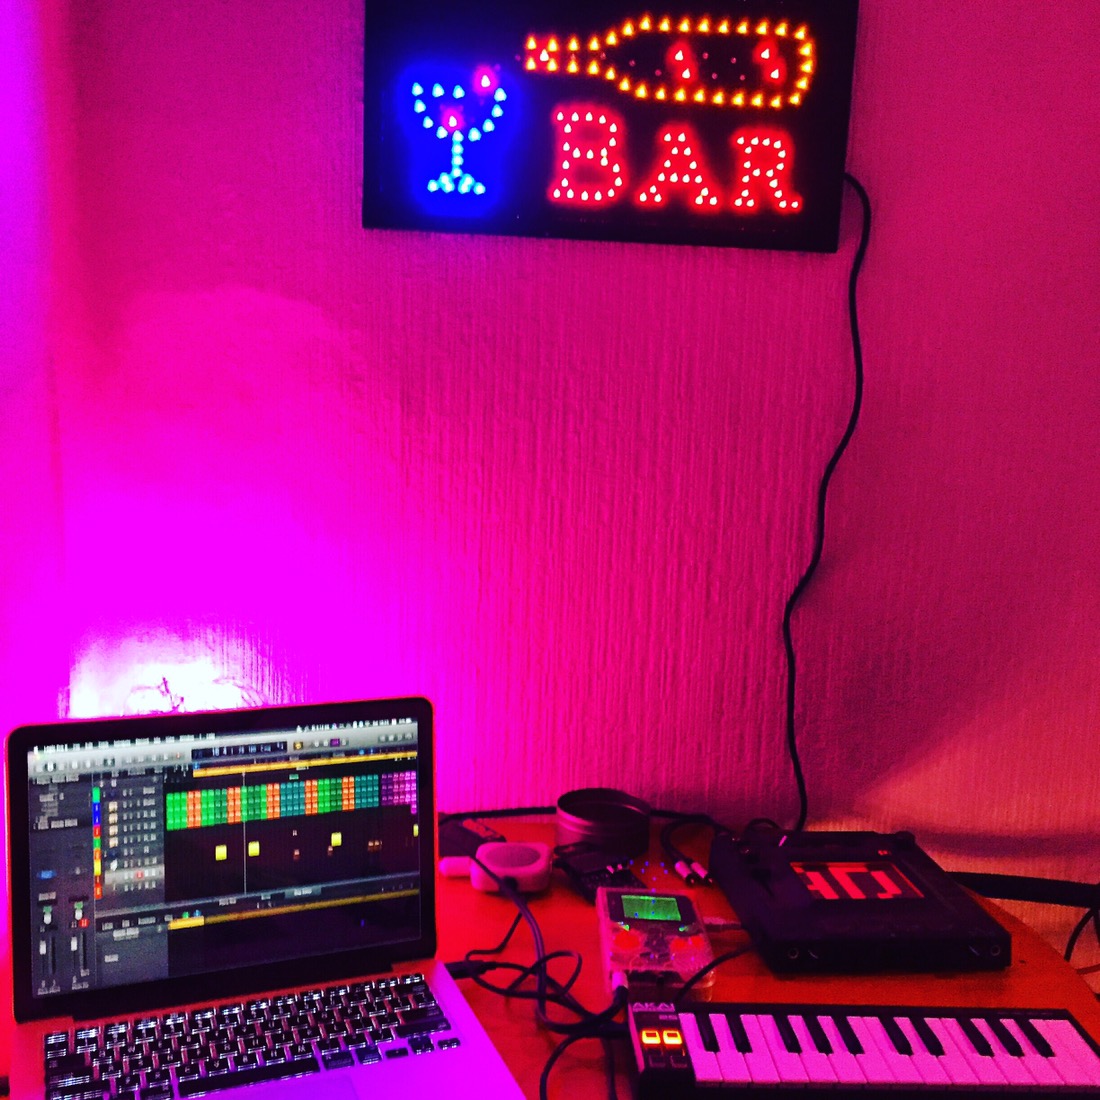
Behold, the new studio:
I’ve set up the Kaoss pad, along with the mixer and Gameboys – all illuminated in some bright LED lights. It’s amazing what having a decent area set aside for making music can do to your motivation.
Unsurprisingly, I ran into a whole host of new issues when I went to record some tracks – both related, and in addition to the ones that I listed last year.
My M-Audio Firewire 410 has finally become properly obsolete. The workarounds that people have developed online simply aren’t working anymore. It’s frustrating as the hardware was still perfectly good – but since it was released over 10 years ago, it was probably a reasonable time to invest in a new interface. This time, I’ve gone for USB.
My Gameboy USB cartridges that house LSDJ are acting up. One of them has crashed and needs the ROM re-flashed (which is a pain in the ass on a Mac), and the other seems to get stuck on the second ROM that is loaded (Pokemon Gold!), rendering LSDJ inaccessible sporadically.
I’ve lost a couple of my Phono couplers, which I used for splitting the signal from the Gameboy so I could run it through the Kaoss pad as well as bypassing it. A stupid minor thing.
I no longer have a keyboard with a MIDI DIN connector, and all of the newer ones that have been released only have MIDI connectivity via USB. That’s all well and good, but not much use if you’re using a hacked together arduinoboy to play the Gameboy as a synth. I had to work out how to use my laptop as a MIDI thru device, which is thankfully up and working now.
It does make you stop and wonder why the hell you go to all this bother to use vintage hardware rather than sticking in some samples and being done with it, but there’s just something so satisfying about using the Gameboy that it’s all worth it in the end.
Maybe.
Everything is coming together nicely now though, and I’ve got some new gear to experiment with too: A Pocket Operator PO-14 (the Sub one), and probably an Ableton Launchpad. My plan is to dive into the MIDI side of things a bit deeper, as it’s something I’ve never really understood that well. Time to change that!
Hopefully this dedicated space will make a big difference. Watch this space.